Disclosure: We may get commissions for purchases made through links in this post.
Full of rustic charm with an innately captivating look, wood slices have become a staple in repurposed DIY decorations. Now you can take your upcycling efforts a step further by using them to create a unique, stunning pathway! Don't know how to do this? Don't worry; we've done the research to find out how so you can get started on this new DIY project right away.
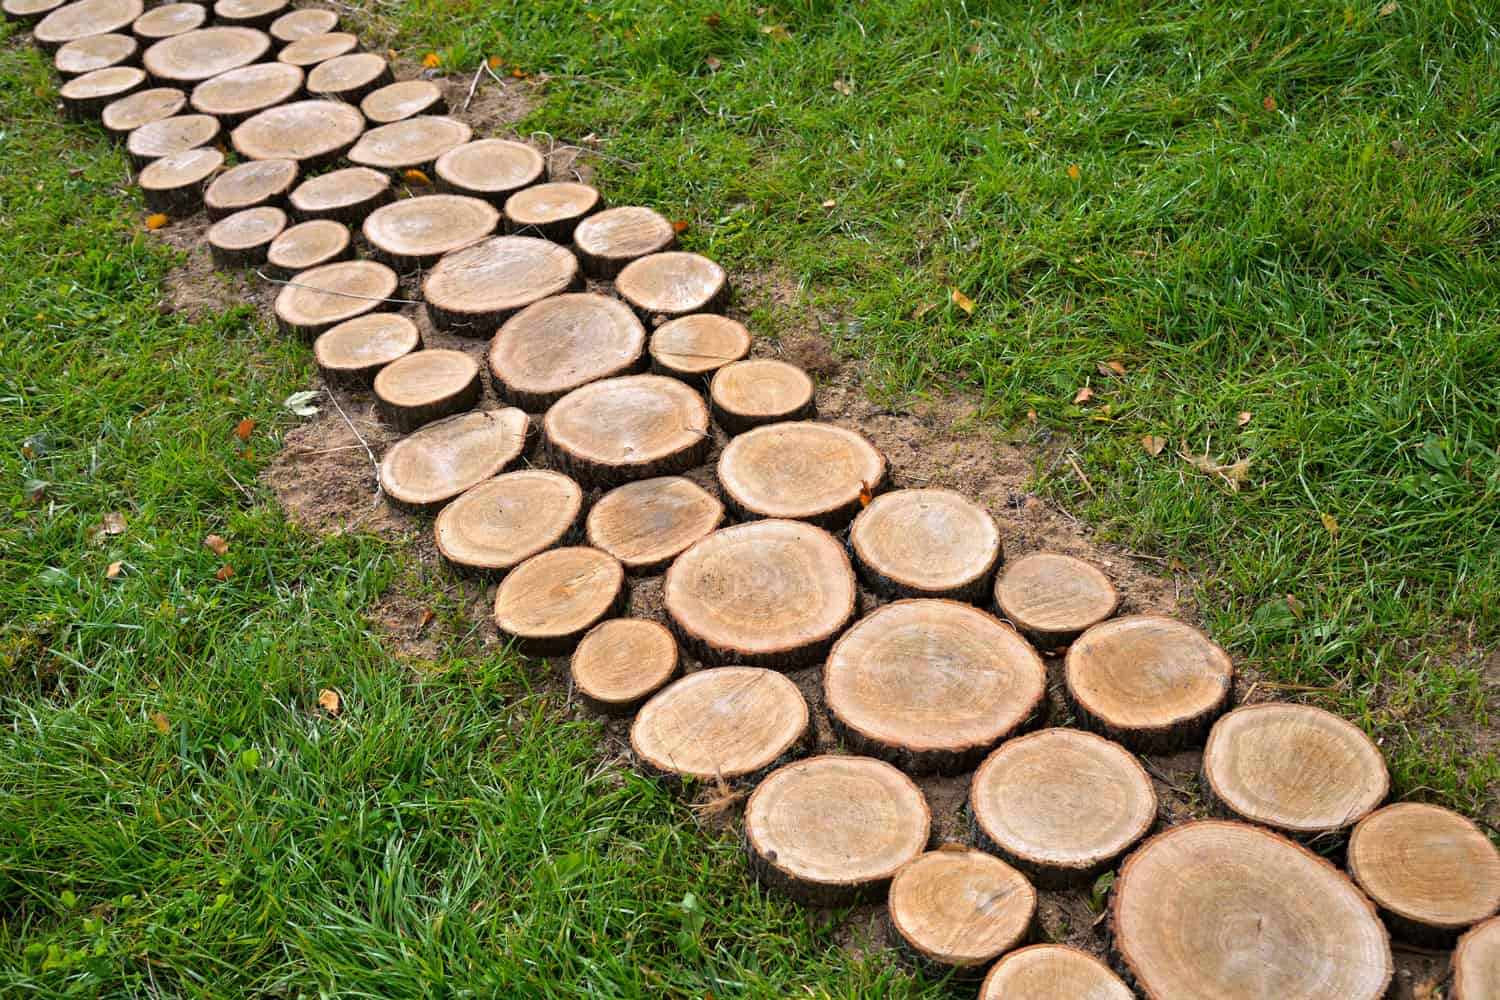
Using tree stumps or wood slices to create a pathway is one of the most creative projects you can take on to transform your outdoors. Here are the steps to do it successfully:
- Clear the designated area for your pathway.
- Mark the path.
- Prepare and level the ground.
- Set the paver base down.
- Cut the wood into discs and treat them.
- Lay the discs down throughout the area.
- Level each disc and fill the gaps with dirt.
- Step on the discs to set them into place.
- Surround the path with wood chips.
For a more comprehensive look at each step, keep reading! We've got tips and tricks for every part of the process to help you finish the project successfully. Plus, we've got design ideas to give you inspiration for the look of your new tree stump pathway, so stay tuned!
Steps to Create A Tree Stump Pathway
The great news is that you can create a tree stump pathway by yourself with a few tools and skills in just a day or two! Inexpensive yet incredibly transformative, this simple home improvement project can help you elevate the look and function of your backyard on a budget.
Follow these steps to make your very own tree stump pathway:
What You'll Need
- Logs
- Wheelbarrow
- Tiller
- Wood sealer or motor oil
- Linseed oil
- Paver base
- Brush
- Trowel
- Rake
- Chainsaw
- Woodchips
1. Clear the designated area for your pathway
First, you'll need to make sure the area where you'll create your pathway is clean and free of any debris. If your designated area has grass, make sure to dig it up and remove all of it.
2. Mark the path
Use a couple of sticks and a string to mark the area where you'll place your pathway. You can also use edging pavers to mark the path and create your desired pattern, such as a curved pathway.
It's extremely important to contact your local municipality before performing this step if you're unsure whether you'll hit any power lines.
3. Prepare and level the ground
You can use a tiller to level the ground, but if you don't have one, a rake will suffice. Another option is to use a tamper and level it by hand. Make sure to remove any debris you may have missed in the previous step.
It's best to remove dirt until it's about three inches lower than its original grade to ensure sufficient space for the paver base and wood slices. Do this until the ground is completely flat.
4. Set the paver base down
Take note that some homeowners skip this step for a more natural look. However, doing this will ensure that your wood slices are set on a solid and stable base.
Any paver base available in your local hardware store or on Amazon will be suitable for this step. Spread it over the area of the pathway with a trowel. Then, use a rake to level the base.

![]()
Check out this paver sand on Amazon.
Pro Tip: you can use a hose to wet the ground before setting your paver base down. This is key to preventing weed growth later on.
5. Cut the wood into discs and treat them
Now for the more difficult part, it's time to cut the wood into discs or slices using a chainsaw. You'll want to make sure each disc is around 2"-4" thick so that they're level with the ground.
Make sure to take the necessary safety precautions for woodworking! Wear a mask, safety glasses, and appropriate gear to shield yourself against accidents. If you're tired or inexperienced with a chainsaw, don't use it and leave the job to someone else.
After cutting, it's important to treat them to prevent rotting and preserve the wood. Using your brush, apply a water-based sealer or motor oil on each side of the disc. You can also use linseed oil for added protection against scratches.

![]()
Check out this can of linseed oil on Amazon.
6. Lay the discs down throughout the area
At this point, you can start placing your wood discs along the marked area. See to it that they're evenly spaced out.
If you have discs of varying sizes, lay the larger ones down first. If you want an exceptionally compact pathway, you can glue the smaller pieces to the larger ones to be sure that they won't come off.
7. Level each disc and fill the gaps with dirt

If you used a paver base, you can skip this step. If not, make sure to use dirt to level each disc and fill the gaps until you have an even surface.
8. Step on the discs to set them into place
It's inevitable that some discs will be thicker than others due to imprecise cutting. Don't worry; this is perfectly acceptable. All you have to do to ensure they're even is to step or jump on them so that they set down a little further into the ground or base. You can also use a mallet for this step if you want to set them into place by hand.
9. Surround the path with wood chips
Wood chips such as cedar chips can help prevent termites from infesting your wood discs, so using them to surround the path can help preserve the look and integrity of your pathway for longer.

![]()
Check out these cedar chips on Amazon.
See how a DIY tree stump pathway is made in action by watching this video:
Design Ideas For A Tree Stump Pathway
The best part of creating your own tree stump pathway is getting creative with it! You can experiment with different wood types and sizes to achieve a specific look or pattern that'll suit your style and make your home stand out.
Here are a few design ideas to inspire you:
Wooden Stepping Stones
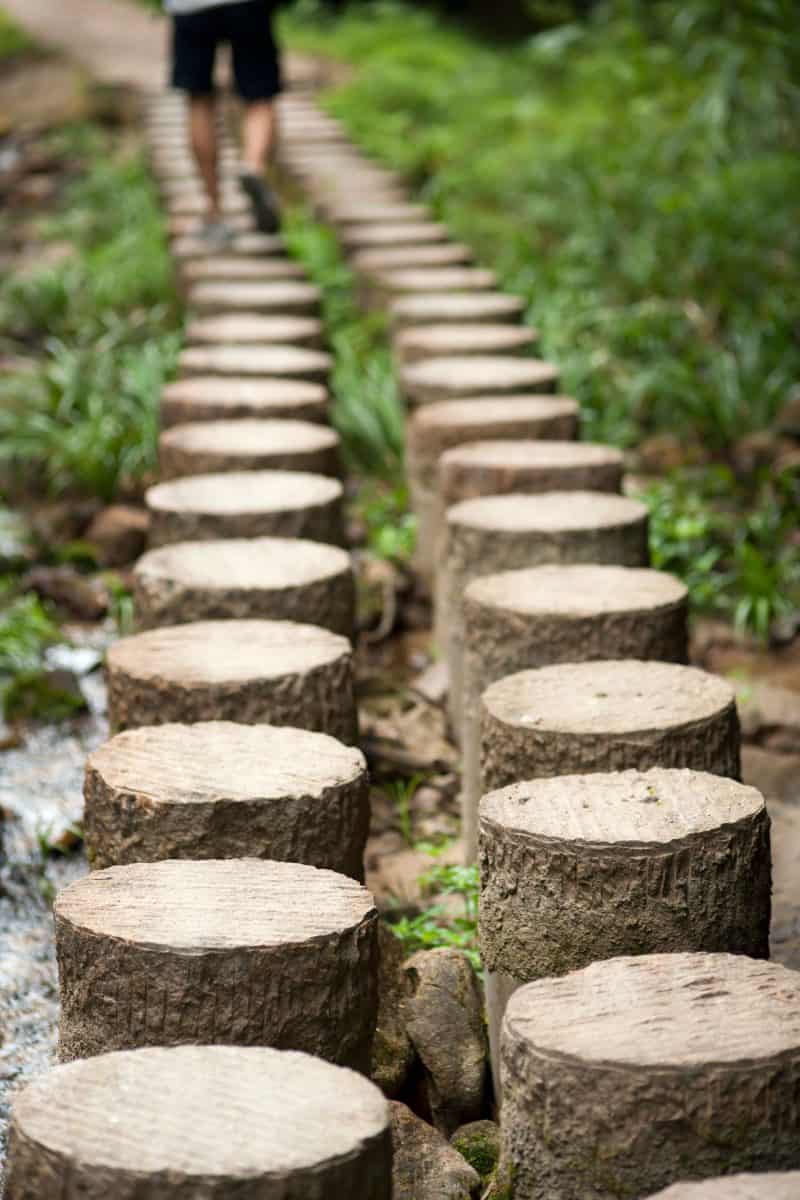
Want something simple yet sophisticated in a way that's reminiscent of long walks in nature? Go for wooden stepping stones! To create this look, all you need to do is leave large gaps between your wood discs and fill them with stones or wood chips.
Captivating Variations
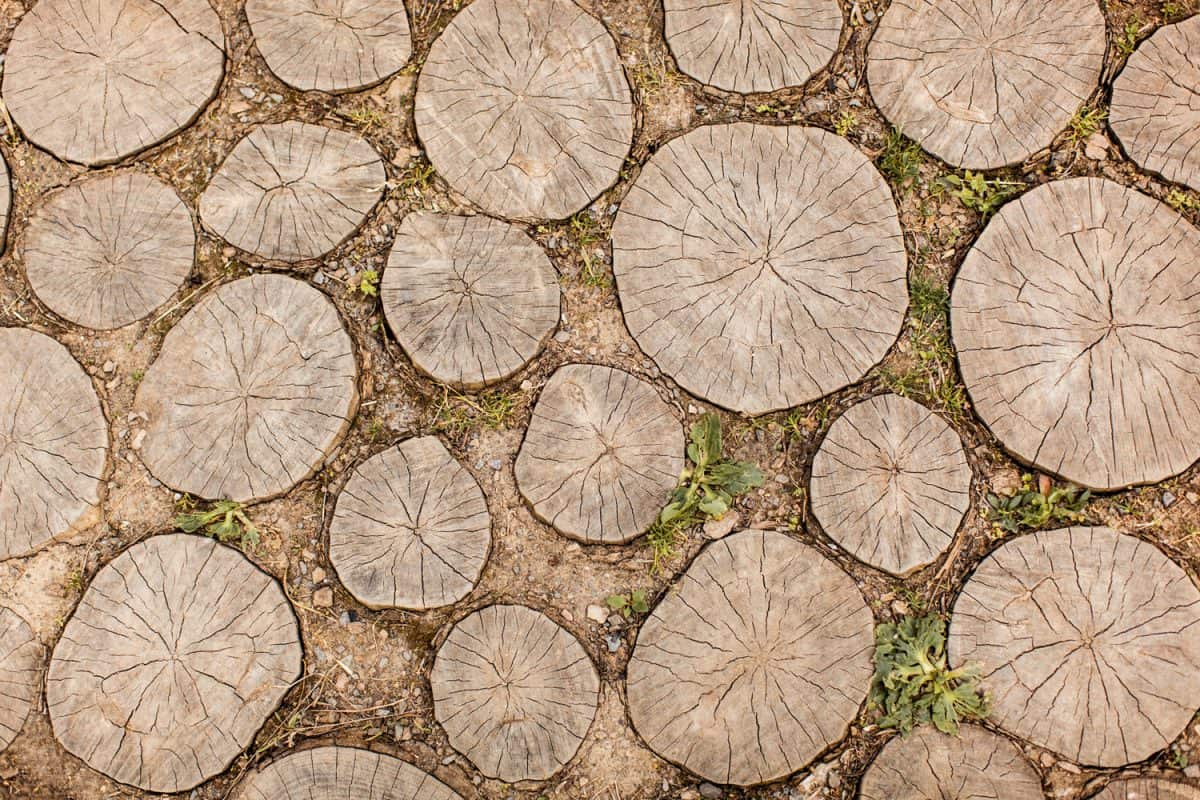
If you're going for a compact pathway with an eye-catching aesthetic, use wood from different types of trees to get varying sizes, colors, and textures. This will add visual interest to create a sense of uniqueness in your pathway. No need to limit yourself since all wood species are suitable for this look!
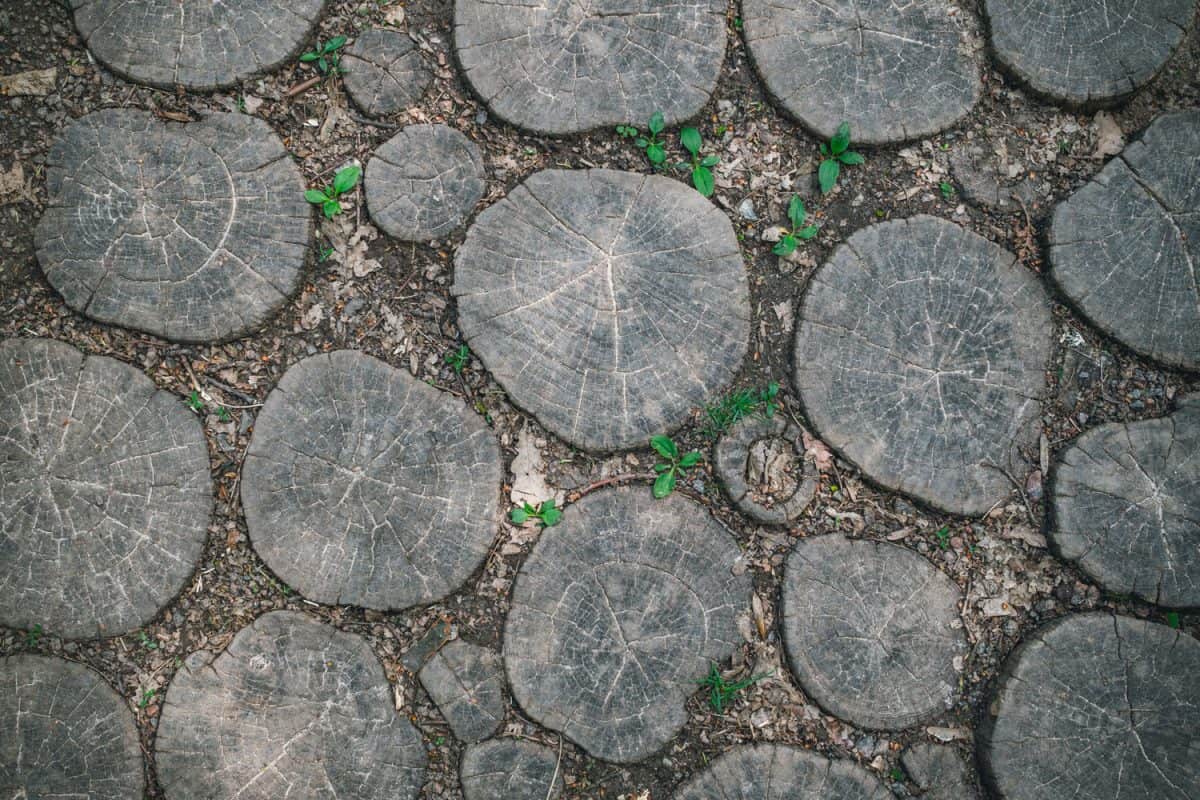
Uniform Look
Trying to achieve a clean, consistent aesthetic? Keep your wood discs uniform! Choose one type of wood, cut it into discs of equal size, and lay them down in an even pattern. This is the perfect way to marry your taste for the contemporary with the natural, rugged appearance of wood.
Walkway to Entry
Make a statement with a tree stump pathway that leads to your front door! Not only is this certain to impress your guests and make for an interesting conversation piece, but it will also enhance your curb appeal effortlessly.
Garden Pathway
What better way to bring life to your garden than by adding a tree stump pathway? Each wood disc surrounded by your homegrown flower beds and plants is sure to stand out and create an all-natural, rustic look.
How do you finish a tree slice?
There are different ways to finish a tree slice if you want to refine its look and protect its surface. The most popular way to do this is by staining or painting it, which will add life and color to your wood slice. Another option is to varnish it for a wet, clean look.
How do you sand a tree stump?
Use 80-grit to 180-grit sandpaper to sand down the tree stump. Make sure to sand with the grain of the wood and follow the rings for proper sanding. Do this along the top and the bottom of the stump. Use finer-grit sandpaper for the sides of the stump.
How do I keep my wood slices from splitting?
Linseed oil, food-grade mineral oil, salt paste, varnish, and wood sealers can help prevent splitting in wood slices. You can soak it in any of these liquids for more protection.
The Wrap-Up
A tree stump pathway evokes the image of a forest, bringing the glory of the great outdoors into your home. If you're ready to give your garden or entryway a whole new look, consider getting your hands a little dirty and creating your own pathway with wood slices!
Can You Mow Over Stepping Stones? [How To Keep Your Pathway Trimmed]
Is Crushed Concrete A Good Paver Base? Considering The Pros & Cons For Your Hardscape?